Translate

Showing posts with label Sid Cooke Coxwolds. Show all posts

Saturday, May 25, 2019

This blogger did a bad, bad thing

So. I have never loved the outside of my Lea style French house/shop so it never really got finished. I had considered starting again, making a new shell and cutting some of the rooms out and transferring them to the new house (as complete units like boomboxes). But I knew this was going to be a lot of work and largely I liked the French house. So I decided to renovate. I also wasn't going to start renos until I had finished some other projects, but I couldn't help myself and spent some time pulling the roof/upper floor off and then decided I'd finish the demo in order to only have to clean up once, so then cut new stair holes and pulled off the exterior finish and interior trims and so on... This is pretty much how it looks now, although at this stage, renos on the kitchen were done:

I removed the stairs from the kitchen and added beadboard to that wall. I also made shelves for that wall and enlarged the kitchen table. So the kitchen is basically done. I am not furnishing/accessorising until renos are done, as there will be lots more construction to do.


You can see where I patched the ceiling. It's not fantastic, but there are going to be scars in this build where I have altered stuff. I like the idea of it. Old houses such as this would've had changes over its lifetime and patch-ups.

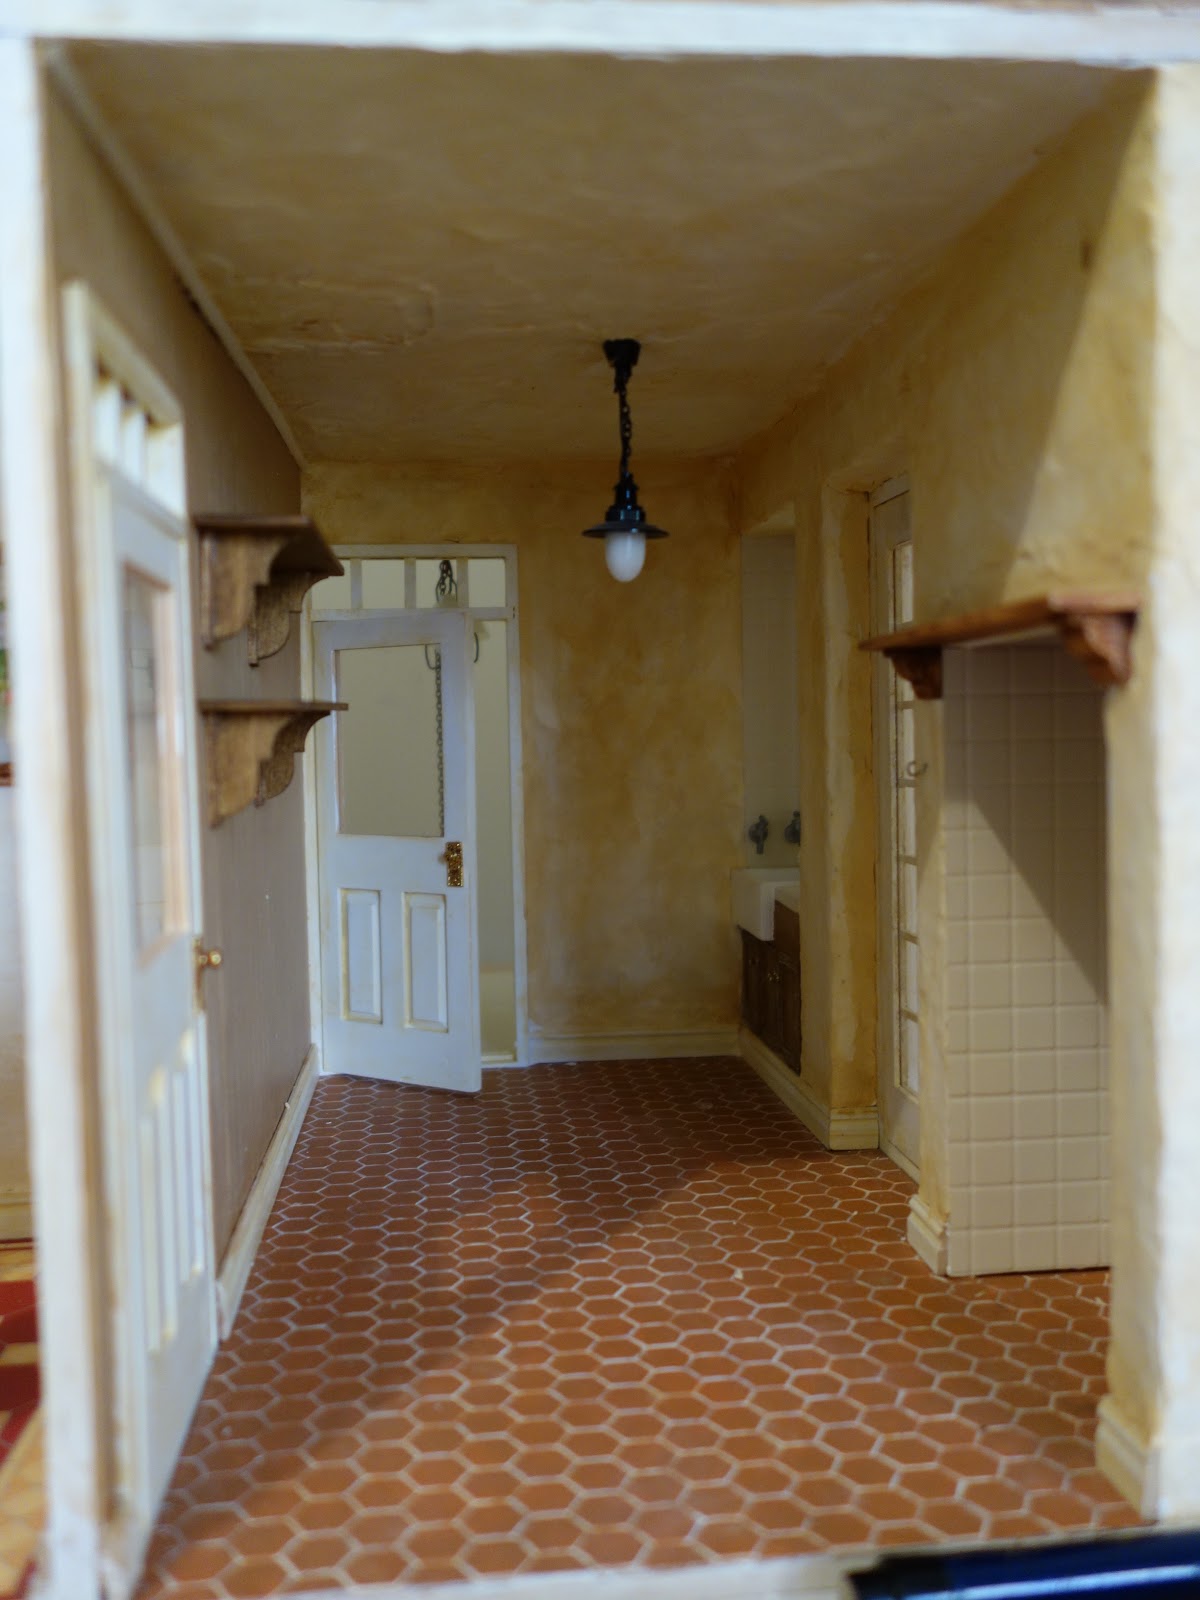
I also painted the plumbing in the bathroom but the paint was flicky so little dots flew everywhere and the walls will need a little touching up. I am stewing over that for a bit. 


I also need to add the shower curtain and some more homey details. I wish I could paint the floor but it would be nigh on impossible with it glued in and I couldn't remove it without destroying it and having to replace it. For now it will remain. It has at least yellowed evenly.

And some progress on the Cotswolds: I have painted the exterior finish. Probably needs a few more washes for a little more variation but I am happy with it. I have added plastic to the bow windows but I don't like that so much. I am not sure I can really fix it to be happy with it though (due to the way the window itself is constructed).


I am also amazed that putting the first coat of paint over the footpath made such a difference to the appearance. It has a long way to go though. I found an early Australian mail box, which you can just see on the left. It was more South Australian than Tasmanian (which is were I am setting this house) but I am OK with that. Really, how different could they have been?? I got it for $2 at the recent Sydney Miniatures Fair.

And I managed to get a pretty good colour on the shop cabinets. It's probably a little darker in real life, so looks very close to the chairs. Now I need to add a little shine. And will likely add some paper to the interior bases and shelves and a solid top. I should really have disguised the joins as well, so it looks like one unit. And yes, the walls are still blue. I think I will wait until accessories are added before I do anything with them. It might give me some direction.


So that is where I am at with these projects. It has been quite rewarding. 

Oh and before signing off, I have discovered why I can't always comment on your blogs. Apparently there is a privacy setting on iPads (Safari web browser) that needs to be switched off in order to not have this problem. At least I think that is the problem. It is so Google and the like can follow what websites you visit and link them to your profile and I am not sure that is something I want. But anyway, if you too are having the same problem this may help you out. Have a good week everyone. xx

Saturday, March 9, 2019

Sunday brick wall

Hi all. It has been a pretty busy and tiresome couple of months for me. The weather has been up and down. We have had lots of fires around our half of the state and my husband has been away a lot. I get tired of hearing my own thoughts after a bit. Also my mum's farms were under threat from one fire, so plenty of worry there for a few weeks. Fortunately she and the other landowners around her dodged bullets and very little damage was done.

Also, my ability to comment is still sporadic, so if I don't comment, don't be offended! I have been trying to go back to your posts when I can comment, but sometimes I might miss one.

I have done about 90% of the roof and most of the lights for the Coxwolds. I have made a start on the last two lights, both for the bedroom. When they are installed, I can finish off the roof. Speaking of which, I found some sheets of milled MDF roof tile in my stash, so with a few undercoats and sanding and a top coat of grey chalk paint, I am pretty happy. When I finish the lights and enclose the roof, I will go over the whole roof with another coat of the grey. Here is the exterior as it is:


This is the cafe:

I am not sure what to do with this. Not sure I like the pale blue rustic-ish walls. I want rustic walls, but these are just not quite right. Perhaps I will just cover them with shelves and pictures so they can't be seen! I like the lights. I like the fireplace and the chairs, as they bring out the darker colours in the wallpaper. Not sure I love the colour of the built-in cabinet but it will have to stay. Not sure what colour to do the counters. I think darker, but a darker timber? I won't be able to match the chairs. Or a dark grey? I can use the same paint as I used on the roof. I can't find the fourth chair FYI, nor the two tables. I seem to have spent 3/4 of the last 3 weeks looking for stuff I've misplaced. 

The living room:


The wicker table is painted with the grey that's on the roof. It's OK. Maybe needs a little highlighting? Not sure what colour to use on the sofa. And the coffee table colour??? The rug will get a dye bath to tone it down. I can't seem to move forward on anything today....

Here is the light I gussied up a bit:


I used a silk cotton to cover the plain white shades, some matching bunka on the top and bottom edges and bunka roses. The light is painted with the Swellegant metal paints.

Here is the bedroom:


You can see the ceiling light on the floor in the photos. I used a normal light with frosted glass tulip shades and added air dry clay petals to make rose shades:


This is the clay I used. It dries transparent:


The wardrobe is the wrong colour, as are the pillows. I made the bed cover from an old hankie. It had a gorgeous embroidered scalloped edge but it was very frayed and I couldn't salvage it. I stitched on a lace instead to cover the edge then stitched the needle lace edging from an old doily around the whole thing. I bought the hottie at a miniature show a few years ago. So cute!


Janine from Minworks asked what I ended up doing to the bath. I just sanded it back, painted it white (a few coats) and used a gloss varnish over the top. The surface is a little rough, but you can't really tell. It will need some sort of screen or curtain now.


The kitchen:


I like the kitchen. It's small, but I think I can make it work OK. I will get a fridge at some point for the right wall and maybe a table and chair. I have since painted the light chain to match the rest of the fitting!

And that is about all I have to show you with the Coxwolds for now. I am just a bit stumped for direction now. And I have some annoying things to finish off before I can do much else. Anyway, any little bits of advice or guidance or opinion would be gratefully received! Hope you all are having a lovely weekend! XX

Tuesday, January 15, 2019

The monumental disasters of doll housing 2

Hello all. just a quick post to let you all know I am trying to comment on your blogs (not to mention reply to comments on my own) and it just doesn't want to work. I have tried to find answers but you know how it goes. Anyway, I will try to work something out.

So you'll notice the title of the post being monumental disasters part 2. This was the next disaster:


See my nice white toilet and the yellow bath? Sigh. I suspect I put too much triple thick on at once and it yellowed as it dried. So I had to sand then paint white then new varnish. It doesn't look great, the surface is quite textured, but at least it is white. And it is tucked inside so hopefully the rough surface won't be very noticeable. I also filled the indentations where the kit taps usually attach. 

Also American Miniaturist is running a series of techniques articles from this month onwards using my Nutcote kit! Quite exciting!


Have a great day everyone. It is another hot one here and I want to get a little laser cutting done before it gets too hot. Will post Coxwolds progress very soon! X

Sunday, December 16, 2018

Baby steps

Hi all. We are in December - can you believe it?? I last posted in July... heck. I guess I have some catching up to do. First I'll show you some little bits and pieces and maybe over the next week or two, I will post some photos of some pretty stuff from our September holiday in France and Italy (sigh, feels so long ago).

A couple of years ago, I missed out on a very pretty dress made by a Melbourne lady whose stuff is sold by another Melbourne lady at the Sydney miniatures fair. Ergo, I commissioned one. It finally arrived a few weeks ago, and it is stunning. Here are the front and back views:


(it even has a petticoat lining)

And completely unnecessarily, she also sent a tiny pair of adorable shoes:


Instead of paying Dianne (the lady who made the dress), I actually made a rose vine for Di, who paid Dianne the cost of the dress (love the barter system):


This is the vine on my Black Walnut cottage:

(it needs some shaping but it is just propped there)

I have worked on my Coxwolds as it is soooo close to being done structurally. I made the sink unit, based on a real life picture:


(Weirdly my taps look much lighter than their real life antique brass look)


Please excuse the crappy photo but we have had rain and cloud and heat and wind and, well, everything. So hopefully will get better shots when the flooring arrives and I can install everything.

I have also done a little more work on my chateau. Here is the rear courtyard entry. Again, terrible photos as it is an enclosed, small space. I will get some photos when  I have finished painting the panels. This is the litmus test to see how I go with painting an aged stone effect. Wish me luck.


 I have used a Sue Cook wall fountain and overdoor ornament. I have to finish the door for the opening. It will have a light behind it so light will shine through the little windows in the door.

In related news, we had our upstairs windows replaced, which meant some touching up of plaster and repainting my sewing room. I am not overly fond of pale walls but it makes my studio much lighter. And whilst everything was in disarray, I took the opportunity to put in some vinyl floor (it had always been painted chipboard which was peeling and was noisy). Looks so much better.


Lastly, some photos of the few minis I managed to find in Italy and France. Well, only Italy actually.

An adorable Pinocchio made of ceramic (although not really a mini, he's probably about 20cm tall). One day I will dress him. And a little puppet theatre:


My Murano glass minis (I'm not sure whether they are from Murano in Italy or Murano in China but that is OK)

 (this shows them with one of my 1:24 chairs, so they are quite tiny)

(Puffer fish!!! Hehehe!)

 OK, I will leave it there for now. I hope everyone has a safe and happy holiday season. It is a difficult time for many I know, so extra hugs to those of you in that boat. We will be having a quiet one. xxx


Friday, January 20, 2017

Mountfield renovations

I decided finally to bite the bullet and start the Mountfield bathroom relocation. It has so far been pretty quick and painless, although whatever glue I used to stick the bathroom sink and toilet down with was dynamite to remove. I haven't removed the wallpaper in the new bathroom as most of it will have tile covering it and whatever isn't covered will just be painted or repapered.

I can't decide on layout as it is a large and sort of awkward shape. I want to build the bath into an alcove and have an enclosed shower, like this from a vintage apartment above a shop I visited a few years ago:


 So this layout would work best (shower at front right) but it makes the toilet/sink space a bit squishy:


These ones not so good:


What are your thoughts? Would like some opinions please.

No real progress on the Coxwolds as I am still waiting on an order for architrave and skirting which I placed in November....

I have made a wall cabinet for the shop, but my foamcore wall (wallpapered on the right) has warped, so I need to somehow straighten it. And that is all the wallpaper I have so can't replace the wall.


Enjoy your weekend everyone.